
0x32【RabbitMQ】整合Spring AMQP实战
本文最后更新于 2025-06-14,文章内容可能已经过时。
- RabbitAdmin
- SpringAMQP 声明
- RabbitTemplate
- SimpleMessageListenerContainer
- MessageListenerAdapter
- MessageConverter
RabbitAdmin
-
RabbitAdmin类可以很好的操作RabbitMQ,在Spring中直接进行注入即可
-
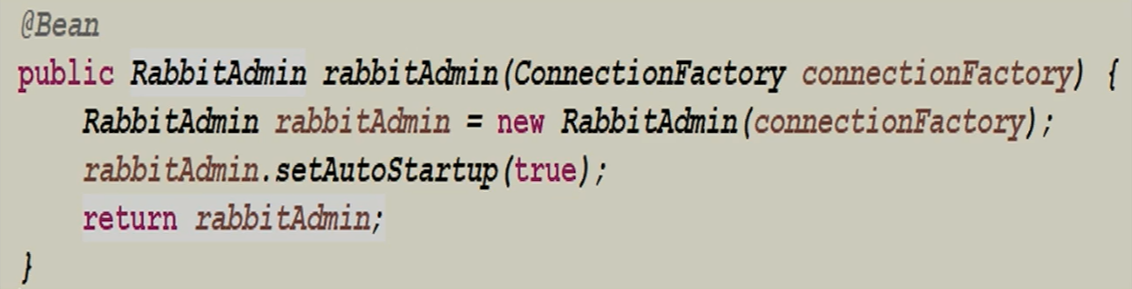
注意:==autoStartup必须要设置为true==,否则Spring容器不会加载RabbitAdmin类。
-
RabbitAdmin底层实现就是从Spring容器中获取Exchange、Binding、RoutingKey以及Queue的@Bean声明;
-
然后使用RabbitTemplate的execute方法执行对应的声明、修改、删除等一系列RabbitMQ基础功能操作。
- 例如:添加一个交换机,删除一个绑定,清空一个队列里的消息等等;
测试代码
新建Spring项目
配置pom
<!--可以不配置这个,spring-boot-starter-amqp中有,配的话注意版本问题应当和当前的Spring版本相适配-->
<dependency>
    <groupId>com.rabbitmq</groupId>
    <artifactId>amqp-client</artifactId>
    <version>5.7.3</version>
</dependency>

<dependency>
    <groupId>org.springframework.boot</groupId>
    <artifactId>spring-boot-starter-amqp</artifactId>
</dependency>
RabbitMQConfig
import org.springframework.amqp.rabbit.connection.CachingConnectionFactory;
import org.springframework.amqp.rabbit.connection.ConnectionFactory;
import org.springframework.amqp.rabbit.core.RabbitAdmin;
import org.springframework.context.annotation.Bean;
import org.springframework.context.annotation.Configuration;
import org.springframework.stereotype.Component;

@Component
@Configuration
public class RabbitConfig {

    @Bean
    public ConnectionFactory connectionFactory(){
        CachingConnectionFactory connectionFactory = new CachingConnectionFactory();
        connectionFactory.setHost("49.235.24.110");
        connectionFactory.setPort(5672);
        connectionFactory.setUsername("guest");
        connectionFactory.setPassword("guest");
        connectionFactory.setVirtualHost("/");

        return connectionFactory;
    }

    @Bean
    public RabbitAdmin rabbitAdmin(ConnectionFactory connectionFactory){
        RabbitAdmin rabbitAdmin = new RabbitAdmin(connectionFactory);
        rabbitAdmin.setAutoStartup(true);
        return rabbitAdmin;
    }
}
测试
@Test
    public void RabbitAdminTest() {
        rabbitAdmin.declareExchange(new DirectExchange("test.direct",false,false));
        rabbitAdmin.declareExchange(new TopicExchange("test.topic",true,false));
        rabbitAdmin.declareExchange(new FanoutExchange("test.fanout",true,false));
        rabbitAdmin.declareQueue(new Queue("test.direct.queue",true,false,false));
        rabbitAdmin.declareQueue(new Queue("test.topic.queue",true,false,false));
        rabbitAdmin.declareQueue(new Queue("test.fanout.queue",true));

        rabbitAdmin.declareBinding(new Binding("test.direct.queue",
                Binding.DestinationType.QUEUE,
                "test.direct","direct",new HashMap<>()));

        rabbitAdmin.declareBinding(BindingBuilder
                .bind(new Queue("test.topic.queue",true,false,false))
                .to(new TopicExchange("test.topic",true,false))
                .with("user.#"));

        // FanoutExchange中的with没有了
        rabbitAdmin.declareBinding(BindingBuilder
                .bind(new Queue("test.fanout.queue",true,false,false))
                .to(new FanoutExchange("test.fanout",true,false)));

        // 清空队列
        rabbitAdmin.purgeQueue("test.direct.queue",false);
    }

SpringAMQP
使用SpringAMQP去声明,就需要使用SpringAMQP的如下模式,即声明@Bean方式
在RabbitMQConfig中添加:
/**
     * 针对消费者配置
     * 1. 设置交换机类型
     * 2. 将队列绑定到交换机
     *  FanoutExchange:将消息分发到所有的绑定队列,无routingkey概念
     *  HeadersExchange:通过添加属性key-value匹配
     *  DirectExchange:按照routingKey分发到指定队列
     *  TopicExchange:多关键字匹配
     *
     */
    @Bean
    public TopicExchange exchange001(){
        return new TopicExchange("topic001",true,false);
    }

    @Bean
    public Queue queue001(){
        return new Queue("queue001",true,false,false);
    }

    @Bean
    public Binding binding001(){
        return BindingBuilder.bind(queue001()).to(exchange001()).with("spring.*");
    }


    @Bean
    public TopicExchange exchange002(){
        return new TopicExchange("topic002",true,false);
    }

    @Bean
    public Queue queue002(){
        return new Queue("queue002",true,false,false);
    }

    @Bean
    public Binding binding002(){
        return BindingBuilder.bind(queue002()).to(exchange002()).with("rabbit.*");
    }


    @Bean
    public TopicExchange exchange003(){
        return new TopicExchange("topic003",true,false);
    }

    @Bean
    public Queue queue003(){
        return new Queue("queue003",true,false,false);
    }

    @Bean
    public Binding binding003(){
        return BindingBuilder.bind(queue003()).to(exchange003()).with("mq.*");
    }

    @Bean
    public Queue queue_image(){
        return new Queue("image_queue",true);
    }

    @Bean
    public Queue queue_pdf(){
        return new Queue("pdf_queue",true);
    }
消息模板-RabbitTemplate
RabbitTemplate:即消息模板
- 我们在与SpringAMQP整合的时候进行发送消息的关键类;
- 该类提供了丰富的发送消息的方法,包括可靠性投递消息方法、回调监听消息接口==ConfirmCallback==、返回值确认接口==ReturnCallback==等等。同样我们需要进行注入到Spring容器中,然后直接使用。
- 在与Spring整合时需要实例化,但在与SpringBoot整合时在配置文件里添加配置即可;
RabbitTemplate测试代码
RabbitMQConfig文件
@Bean
public RabbitTemplate rabbitTemplate(ConnectionFactory connectionFactory){
    RabbitTemplate rabbitTemplate = new RabbitTemplate(connectionFactory);
    return rabbitTemplate;
}
测试文件
	@Autowired
    RabbitTemplate rabbitTemplate;

    @Test
    public void testsendMessage1(){
        MessageProperties messageProperties = new MessageProperties();
        messageProperties.getHeaders().put("desc","消息描述");
        messageProperties.getHeaders().put("type","自定义消息类型");
        Message message = new Message("Hello RabbitMQ".getBytes(),messageProperties);

        rabbitTemplate.convertAndSend("topic001", "spring.amqp", message, new MessagePostProcessor() {
            @Override
            public Message postProcessMessage(Message message) throws AmqpException {
                // 发送消息时对原来的消息进行进一步的加工,加工之后在发送
                System.err.println("=========添加额外的配置=========");
                message.getMessageProperties().getHeaders().put("desc","额外修改的信息描述");
                message.getMessageProperties().getHeaders().put("atter","额外新加的属性");

                return message;
            }
        });
    }

    @Test
    public void testsendMessage2(){
        MessageProperties messageProperties = new MessageProperties();
        messageProperties.setContentType("text/plain");
        Message message = new Message("mq 消息1234".getBytes(),messageProperties);

        rabbitTemplate.send("topic001","spring.abc",message);

        rabbitTemplate.convertAndSend("topic002","rabbit.save","hello object message send!");
        rabbitTemplate.convertAndSend("topic003","mq.abc","hello object message send!");
    }
本文是原创文章,采用 CC BY-NC-ND 4.0 协议,完整转载请注明来自 程序员小航
阅读建议

评论
匿名评论
隐私政策
你无需删除空行,直接评论以获取最佳展示效果